To turn off Recall in Windows 11, you need to disable a Group Policy called “Allow Recall to be enabled” and restart your PC. In the case of Windows 11 Home, you need to create a Registry value called “AllowRecallEnablement” and save the changes, then reboot the system to remove the Recall AI feature completely.
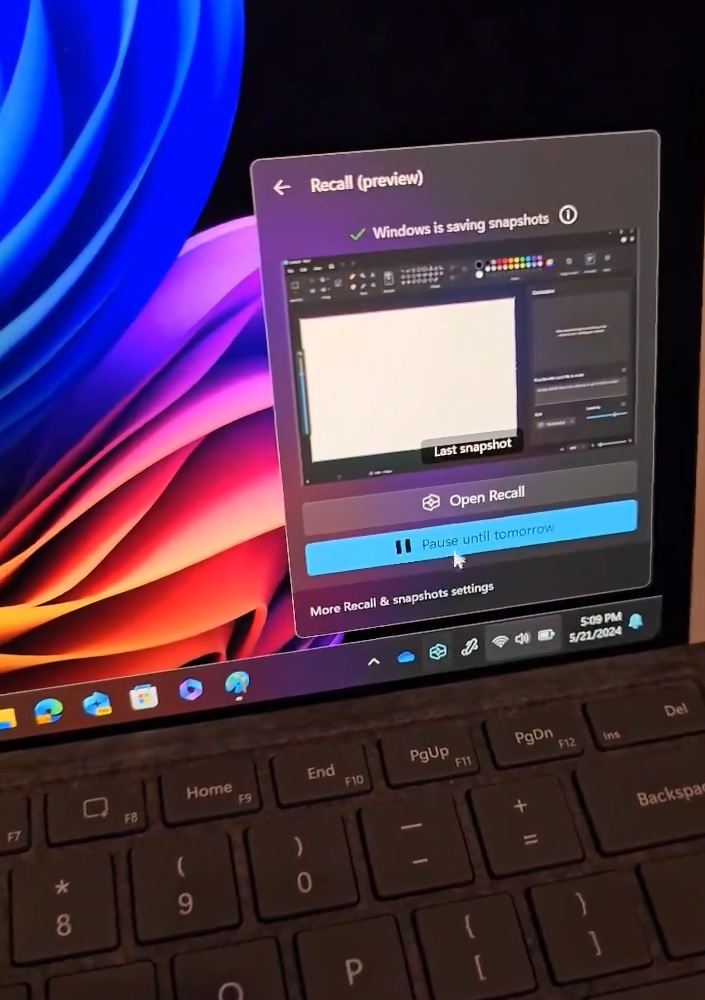
But what even is Recall, and why might you want to keep it at bay? Windows Recall is an AI-powered feature that records your screen by capturing snapshots at regular intervals, so you can go back in time and resume your activity. That’s the core idea of Recall, but do you really need it?
Recall is the flagship feature of Copilot+ PC, a new lineup with exclusive NPU chips, and it’s not available on older PCs. If you recently purchased a Copilot+ PC, you’ll begin seeing Recall during the OOBE (out-of-the-box experience) screen when booting Windows 11.
Microsoft believes Recall is the best AI feature for a PC, and it’s shipping it to all AI PCs, but you won’t be forced to use it. Still, Recall files are there on your PC. If you don’t want Recall-related components present on Windows 11, you can remove them completely using the Group Policy Editor or the Registry Editor.
1. Disable Recall in Windows 11 using the Group Policy Editor
To turn off Recall using Group Policy Editor, follow these steps on Windows 11 24H2:
- Press the Win key, type gpedit.msc, and press Enter to launch the Group Policy Editor.
- In Group Policy Editor, navigate to the following path:
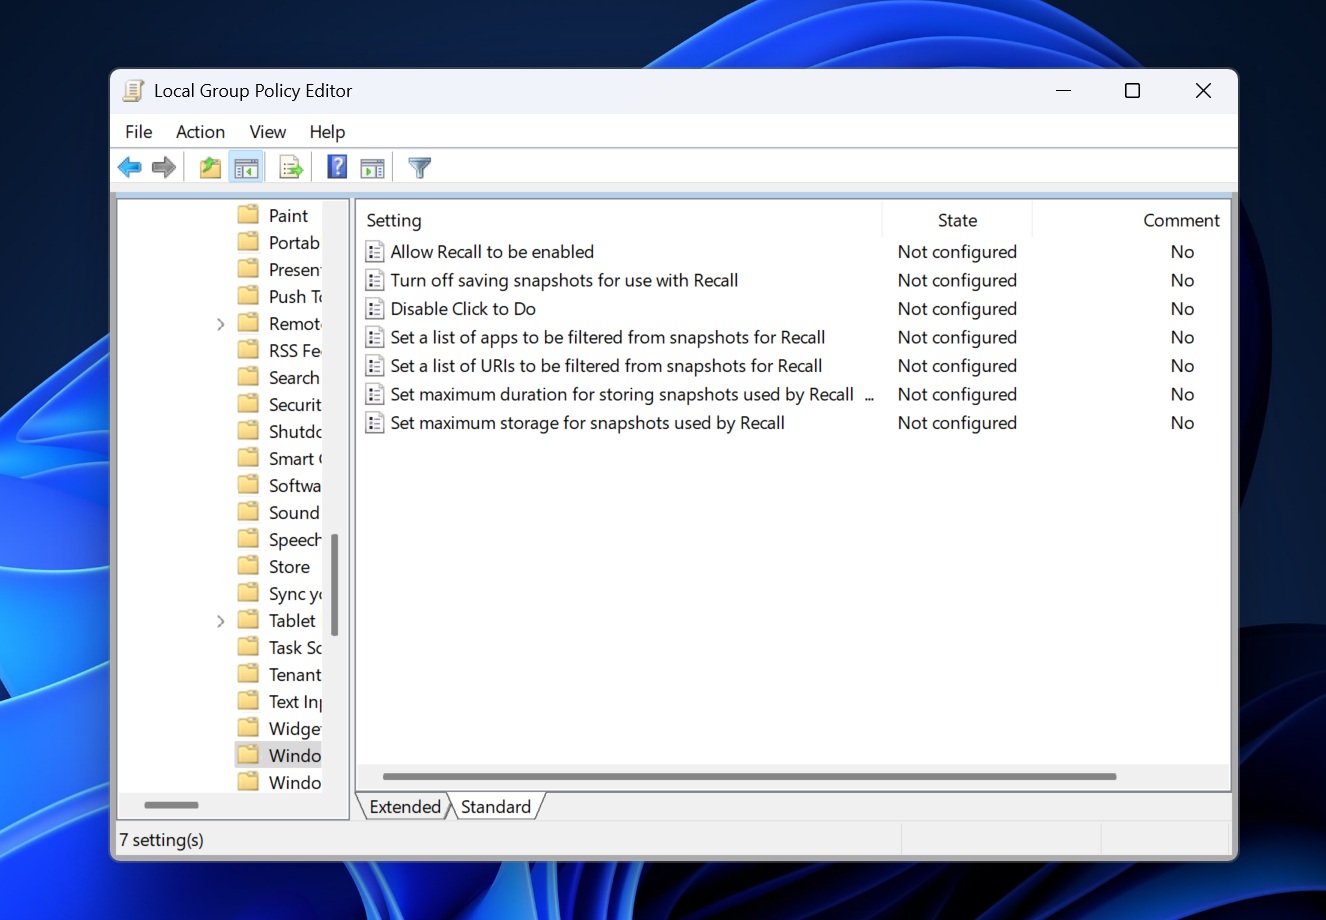
Computer Configuration > Administrative Templates > Windows Components > Windows AI
- On the right side, you’ll see “Windows AI.” Inside this local folder, look for Allow Recall to be enabled. In our case, it was the first policy inside the Windows AI folder.
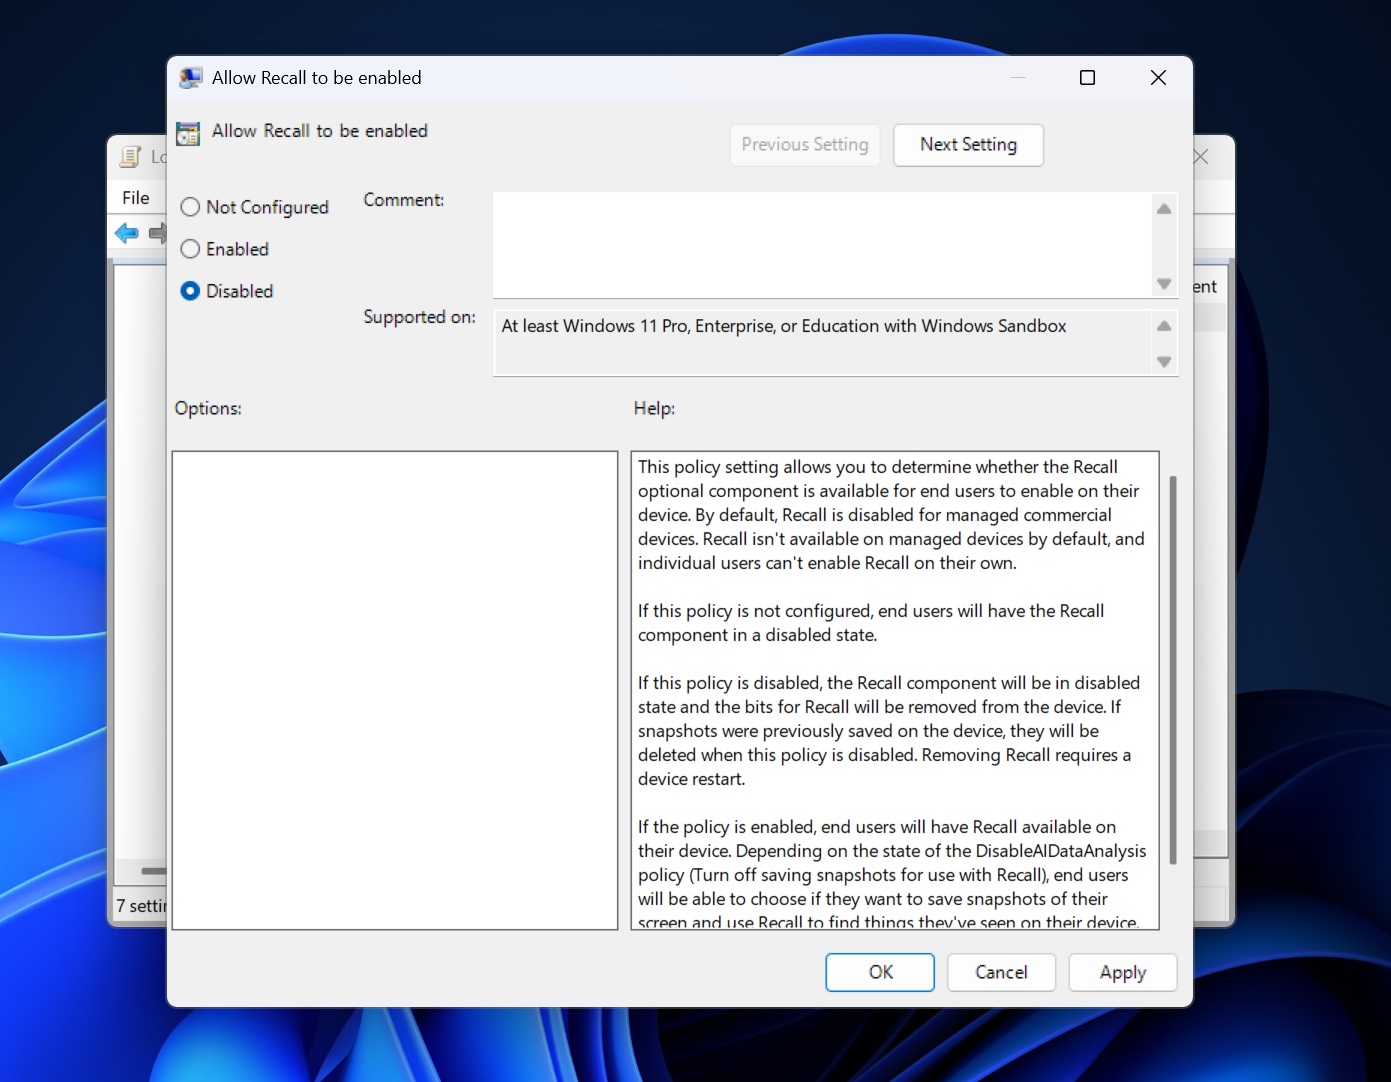
- Double-click Allow Recall to be enabled policy.
- Select the Disabled radio button in the Group Policy Editor and click on the Apply button.
- Restart your PC to apply the changes.
As you can see in the above screenshot, Group Policy clarifies everything about how Recall is turned on in Windows 11.
By default, “Allow Recall to be enabled” policy is set to “Not Configured” and Microsoft says the policy can be controlled to determine whether Recall optional component is available for end users to enable on their device.
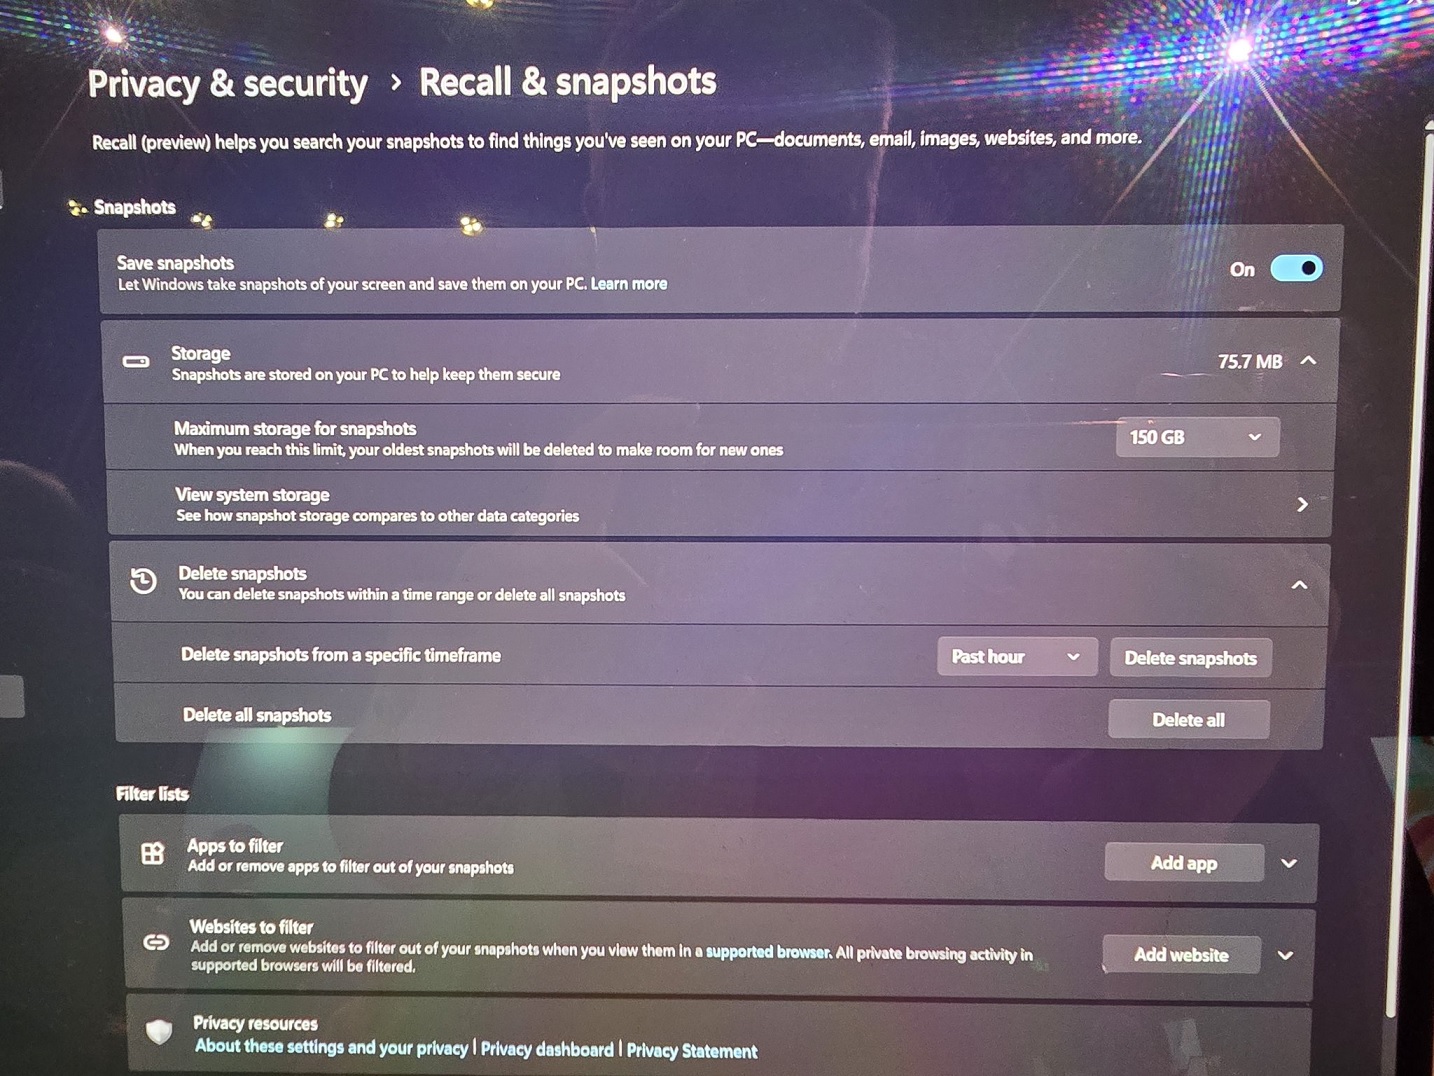
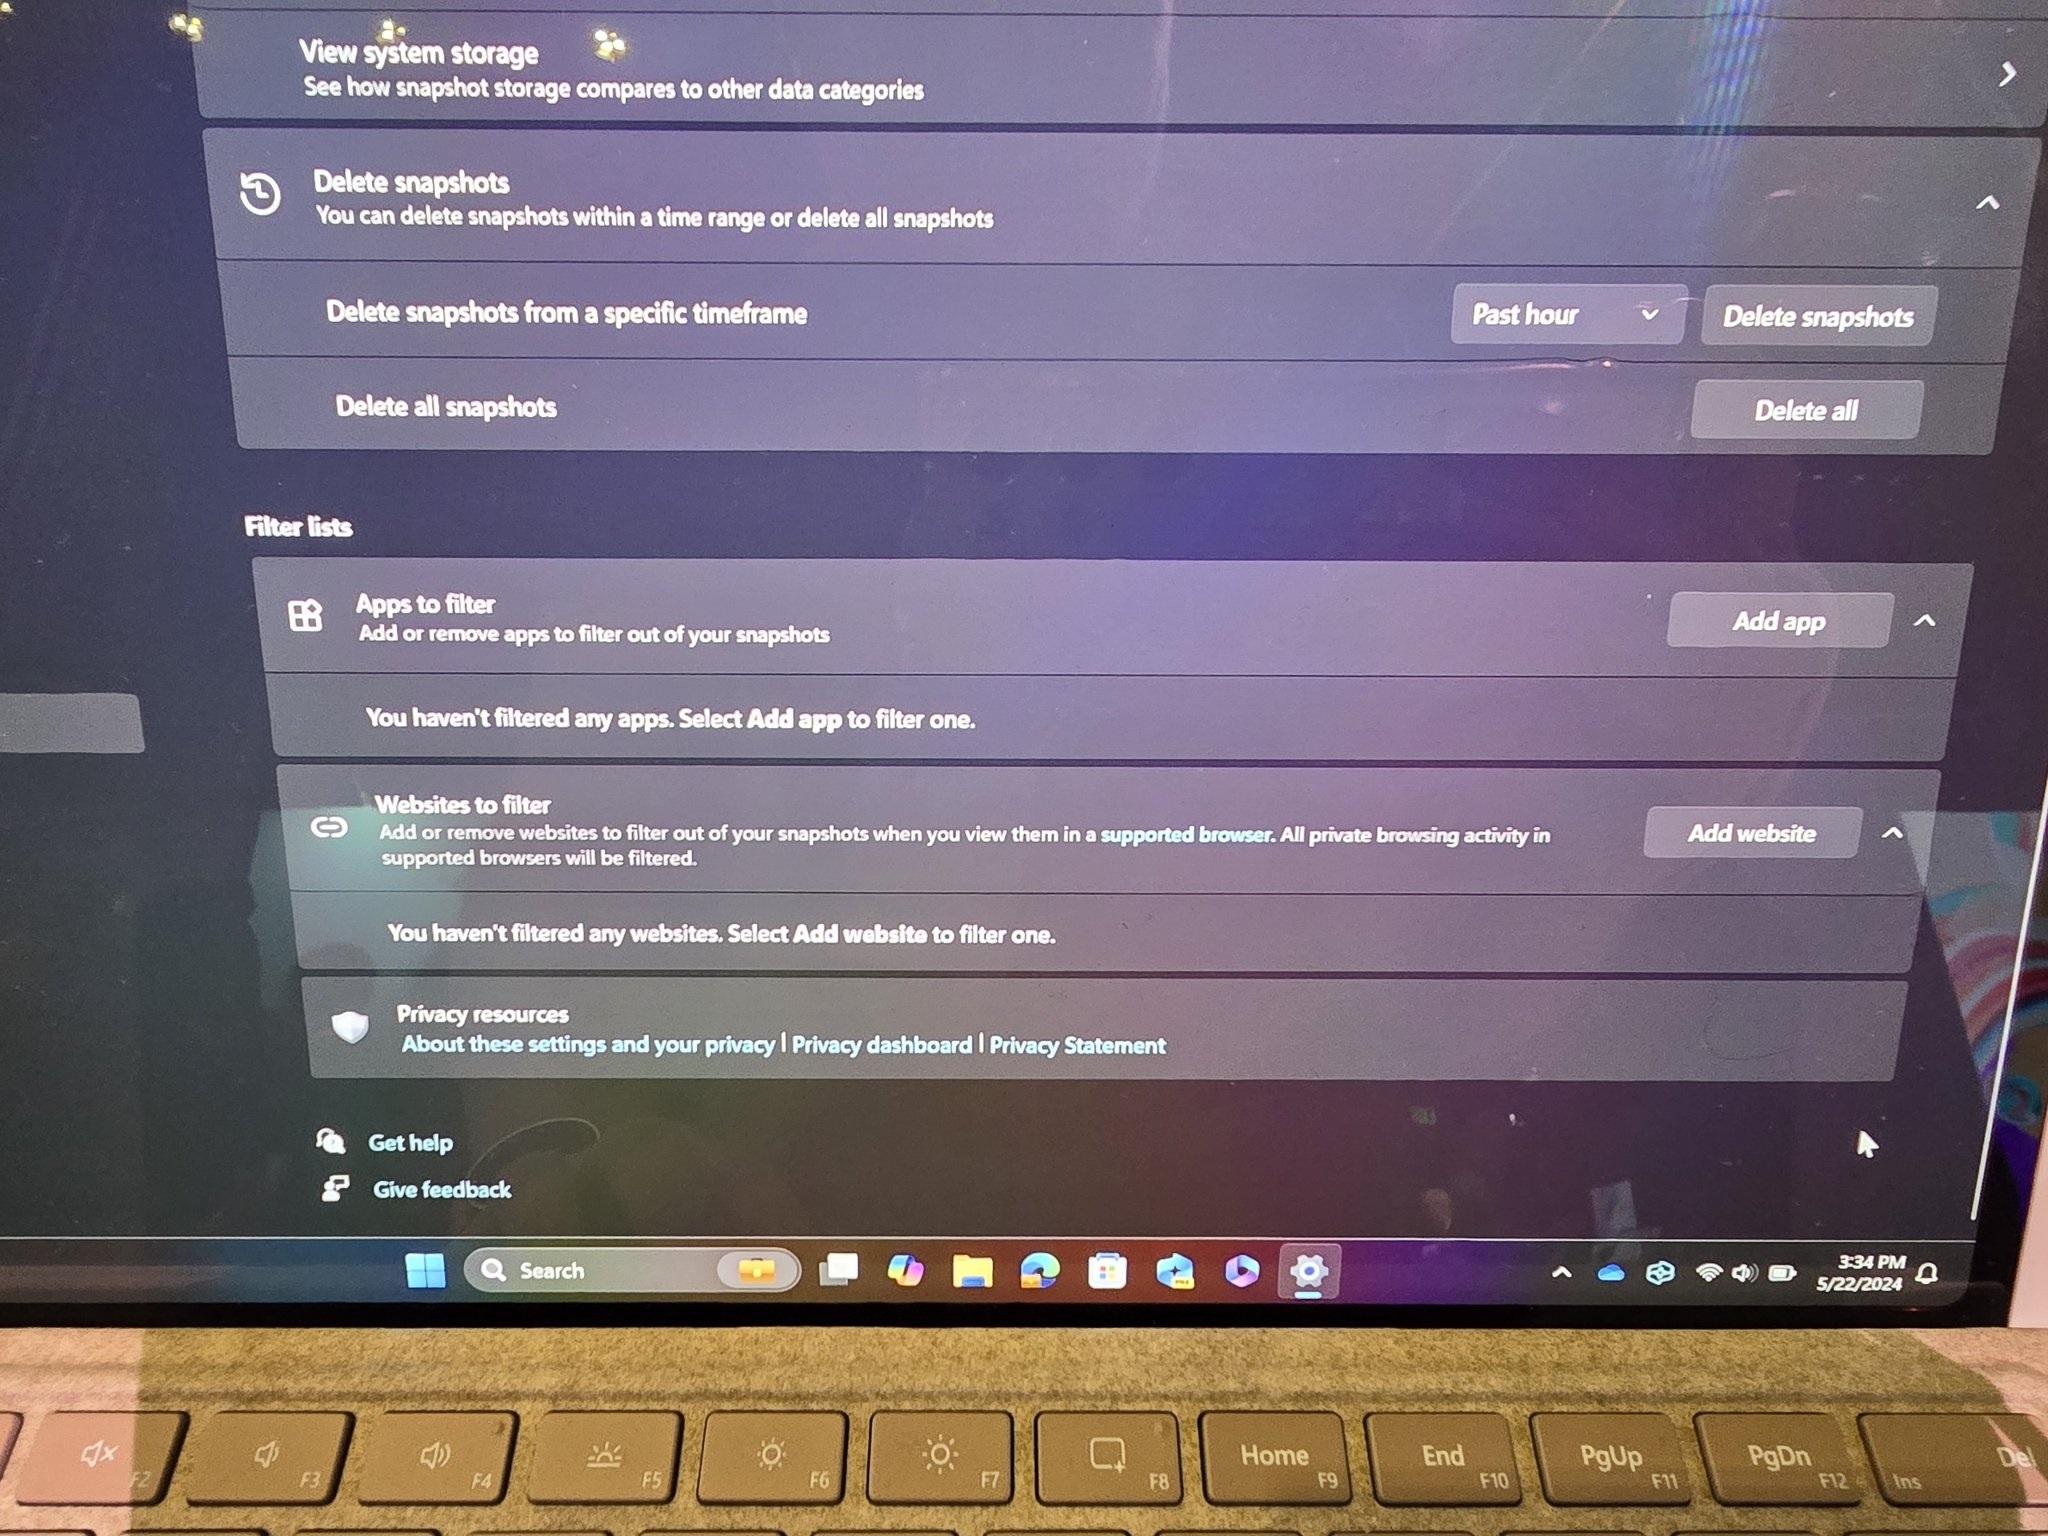
While Recall is not turned on by default, you’ll still have the Recall toggle and related bits in the operating system unless you use the Group Policy to completely remove it. When the policy is set to “Disabled,” you’ll not see anything related to Recall in the operating system. Otherwise, the Recall toggle is offered via Settings.
“If this policy is disabled, the Recall component will be in disabled state and the bits for Recall will be removed from the device,” Microsoft noted in the Group Policy.
Removing the Recall component always requires a system reboot.
2. Remove Recall from Windows 11 using the Registry Editor
To remove Recall AI from Windows 11 using Registry Editor, follow these steps:
- Press the Win key, type regedit, and press Enter to launch the Registry Editor. You might see the UAC prompt. Click on Yes to continue.
- Navigate to the following path:
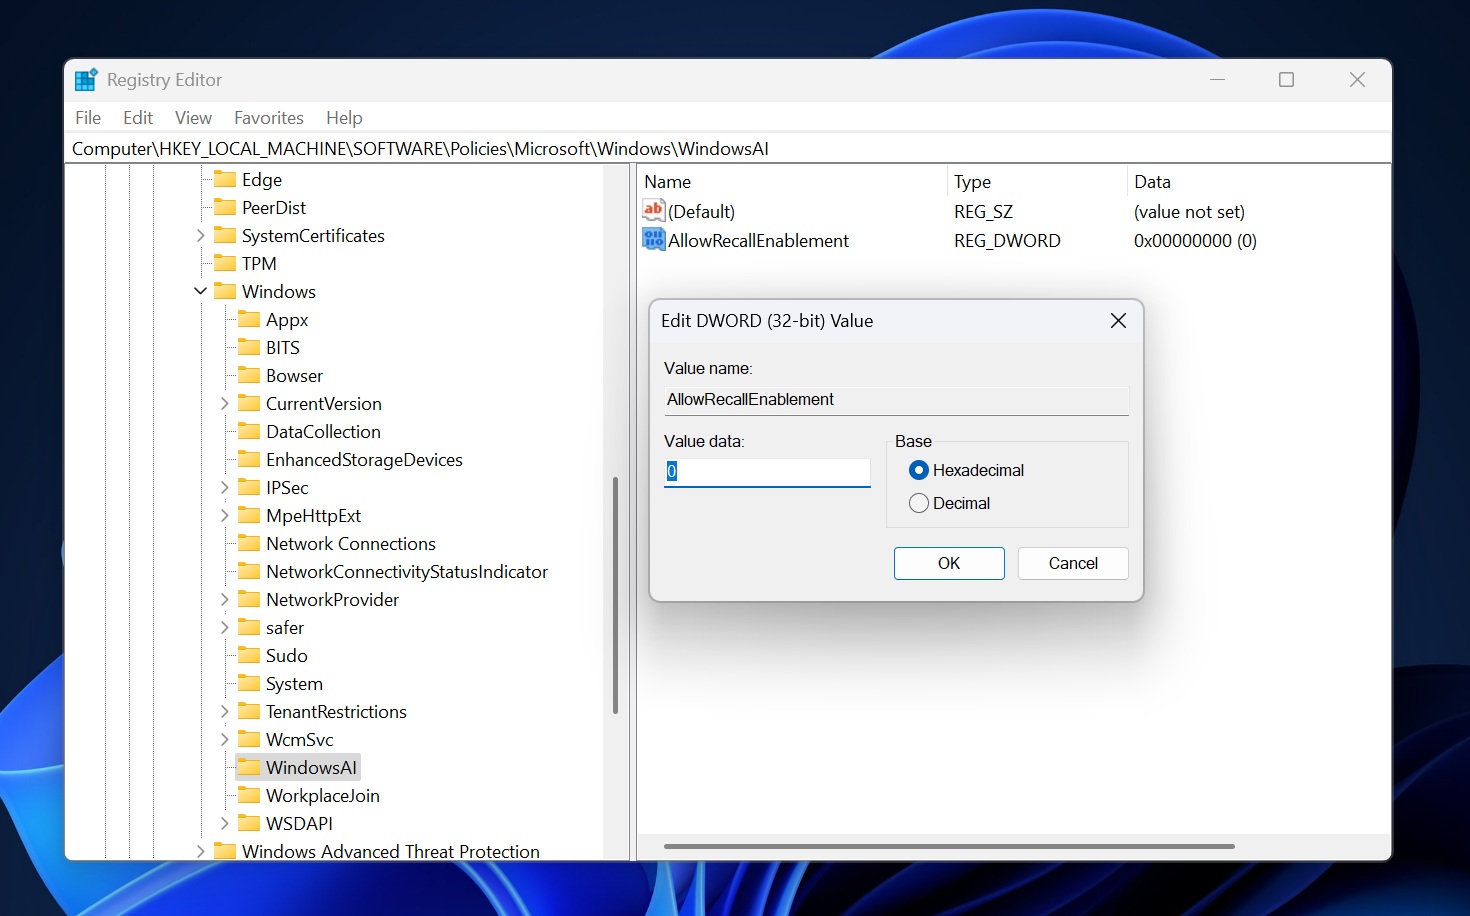
ComputerHKEY_LOCAL_MACHINESOFTWAREPoliciesMicrosoftWindowsWindowsAI
- Right-click on the right-hand side pane and select New > DWORD (32-bit) Value and name it AllowRecallEnablement.
- Double-click on the newly created value and set the Value Data to 0. Keep the Base as Hexadecimal.
- Close the Registry Editor and restart the PC to apply the changes.
Windows 11 Home users don’t have access to the Group Policy Editor. So, the Group Policy method is useless for anyone using the Copilot+ PC Home version.
However, when you apply a policy in the Group Policy Editor (GPE), it actually creates a registry entry using which your system understands what to do with the feature. GPE is basically a GUI for managing policies/scripts.
In this case, GPE creates the AllowRecallEnablement registry value to manipulate the Recall feature, and the above steps allow you to do that on Windows 11 Home.
3. Turn off Recall in Windows 11 using PowerShell
Admins can manage Recall AI on connected PCs using a simple PowerShell command.
Since Recall can only be managed by admins in Enterprise environments, running the following command can turn off the feature and remove related data, if any:
Disable-WindowsOptionalFeature -Online -FeatureName "Recall" -Remove
Why might you want to remove the Windows 11 AI feature?
As I mentioned above, Recall is a great way to go back in time. You can use Recall to find specific moments even when you don’t remember the exact details. It could be a crucial file you were working on or a vacation photo of a special friend, Recall can help you reach it instantly.
This works because Recalls records your screen, and it knows what you are doing on your browser, app, and other areas of the operating system.
At the same time, Recall is one of the most controversial features of Windows 11 because an AI recording your screen sounds creepy. Microsoft was forced to pull Recall from early preview builds because the AI feature was insecure and had privacy issues, which were spotted by security researchers.
It’s been almost a year, and Recall is back again. This time, it’s finally secure and rolling out to everyone with a Copilot+ PC. Some might like the feature, while others will continue to hate it.
Whatever the case, you now know three methods to get rid of Recall AI in Windows 11. Previously, there was a fourth method to disable Recall AI in Optional Features, but that doesn’t exist now.
The post How to disable Recall in Windows 11 (Registry script to turn off Recall AI) appeared first on Windows Latest