Microsoft has updated its old support document with slight changes in the wording to warn users about unsafe apps on Windows 10, and the need to switch to Windows 11 as soon as possible.
As a Windows user, you must be informed about the types of applications installed on your PC. Apps on Windows OS can be classified into three types: Clean, malware, and unwanted apps.
Clean apps are the ones available on the Microsoft Store or the apps installed on your PC by default. They are apps that Microsoft suggests using on a Windows computer. The malware-laced apps need no introduction. Installing such apps from untrusted sources opens the door to virus attacks on your PC.
Finally, in the grey zone of the app category triad, there are the potentially unwanted apps, or PUAs. They may not hide any potential malware within them, but such apps are not found on the Microsoft Store. Users download their setup files from unofficial sources. Also, these apps will push specific services that you do not intend to use.
Microsoft advises users still running Windows 10 to step up their PC experience by switching to Windows 11 through a clean installation. Windows 11 security settings offer different options to block potentially unwanted apps from installing on your PC.
Moreover, Microsoft warns that after October 2025, Windows 10 won’t receive any software or security updates, leaving PCs more vulnerable to attacks. To stay protected, the document suggests upgrading to Windows 11, which comes with improved security features like Smart App Control and safeguards against unwanted apps.
Microsoft is apparently using these security features as a new selling pointers for those still on Windows 10. But how do you go ahead and replace Windows 10 in a way that you don’t end up adding more bloat to the OS? We’ll explain.
How to Clean Install Windows 11?
While the clean installation of Windows 11 may sound like some highly technical stuff, in reality it is the easiest and safest way to install Windows 11 on a PC.
Using the Media Creation Tool, you have to set up a bootable USB drive, which you will later use to install Windows 11.
Before starting, ensure that you have a seamless and stable WiFi network in your home/office. You need another PC that already runs Windows 11. By connecting the blank USB drive to it, you can create a bootable disk containing Windows 11.
Also, on your Windows 10 PC, back up the important files and app setup files to the cloud, as a clean installation will completely remove existing files on the PC.
- Grab a blank USB drive with 8GB or more storage capacity and insert it into a PC that already has Windows 11 installed on it.
- On that PC, Download the Windows 11 Media Creation Tool.
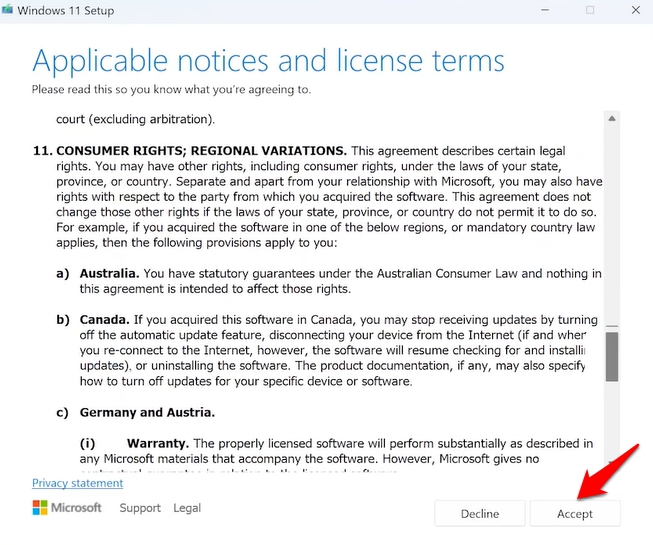
- Run the Media Creation Tool and accept the TOS.
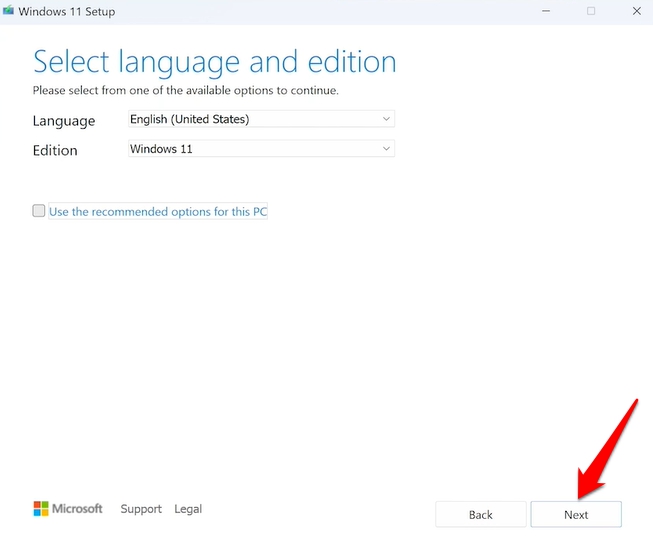
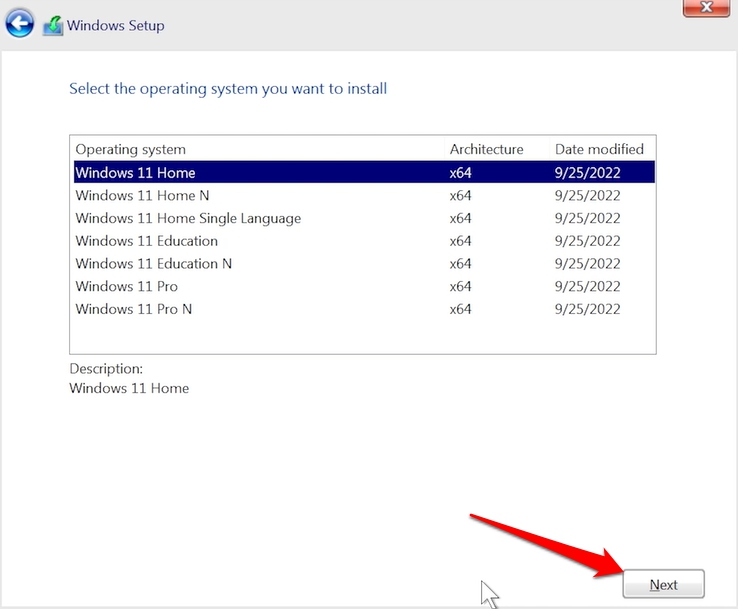
- Select the Edition of Windows 11 you want to create in the bootable disk.
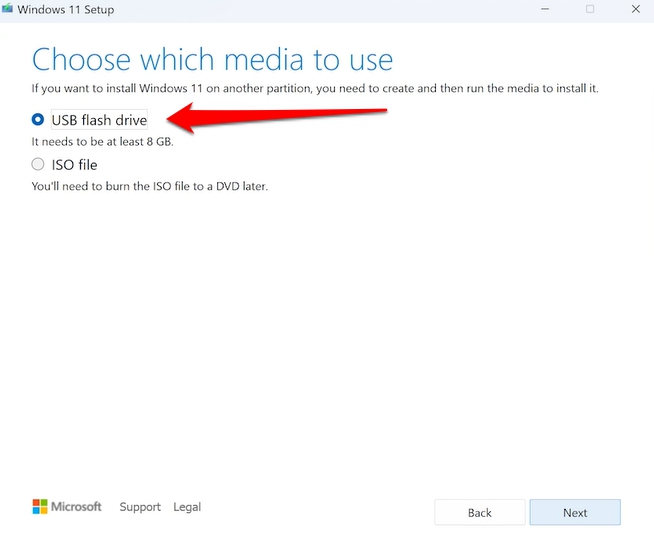
- Select USB Flash Drive under Which Media to Use.
- Wait for some time for the Windows 11 media bootable disk to complete.
- Now, insert the bootable USB disk on your PC running Windows 10.
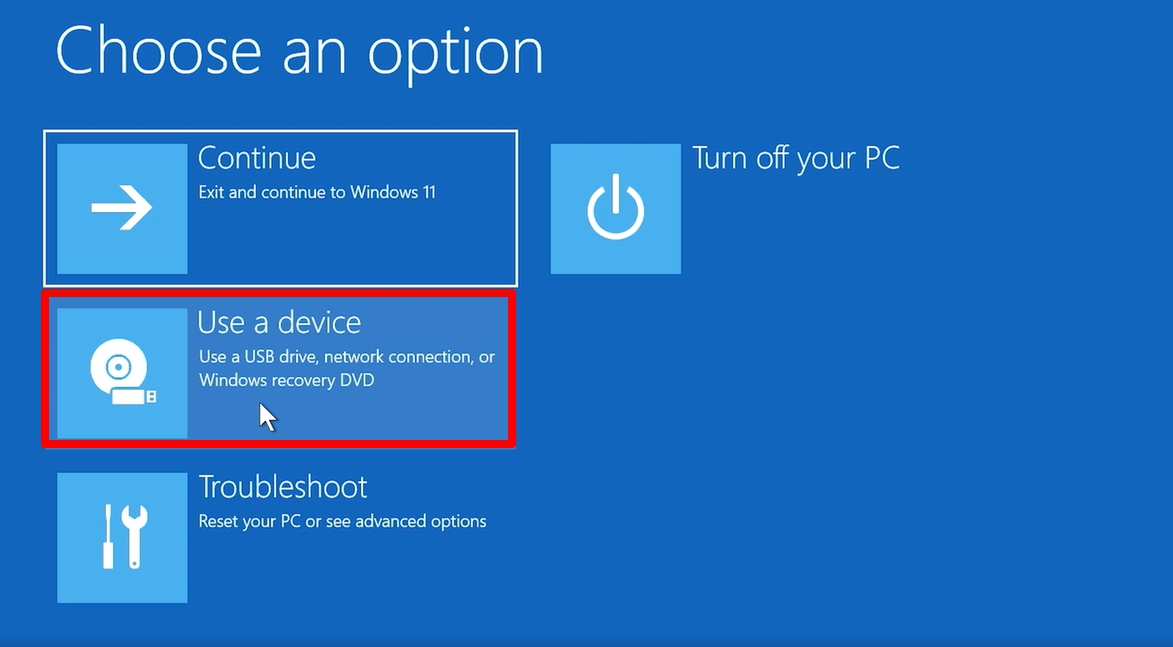
- Restart your PC and hold the Shift key to boot into Recovery Mode.
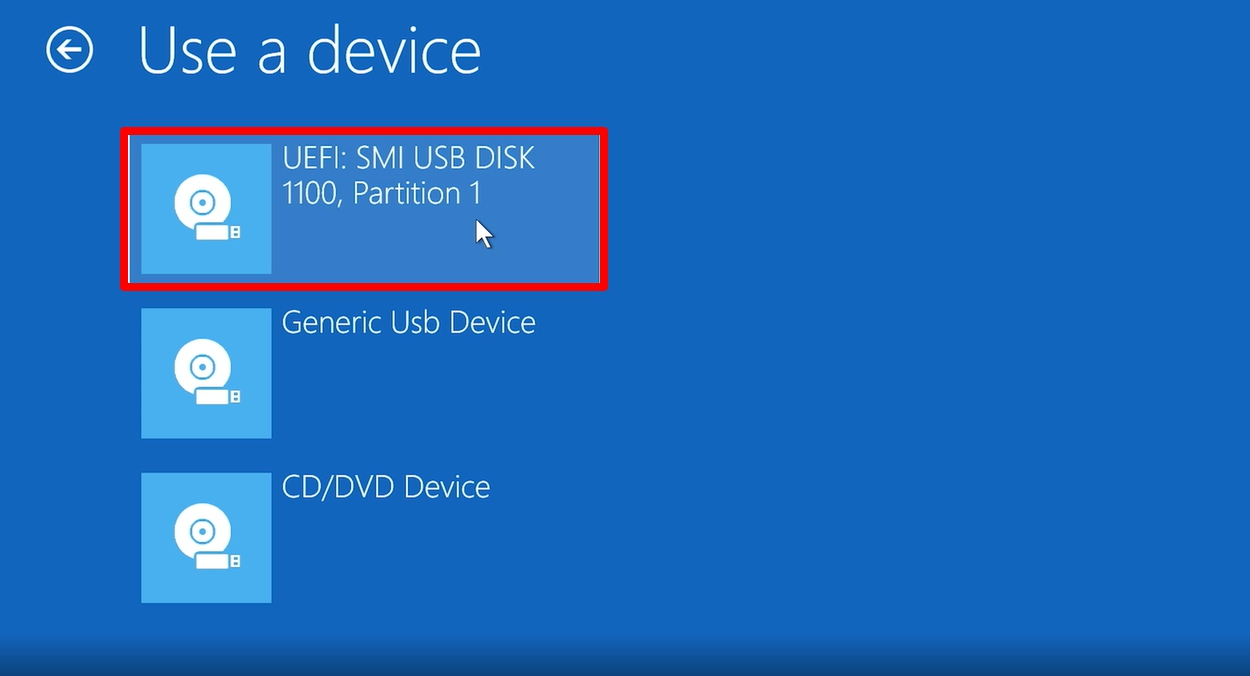
- In the Recovery environment, select Use a Device.
- Select the USB Disk that now contains the Windows 11 media.
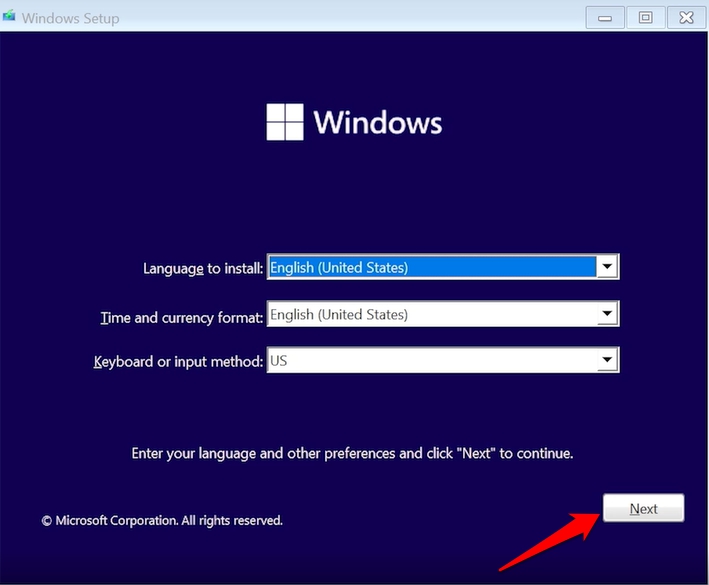
- On the setup screen, select the language, time, and keyboard input method.
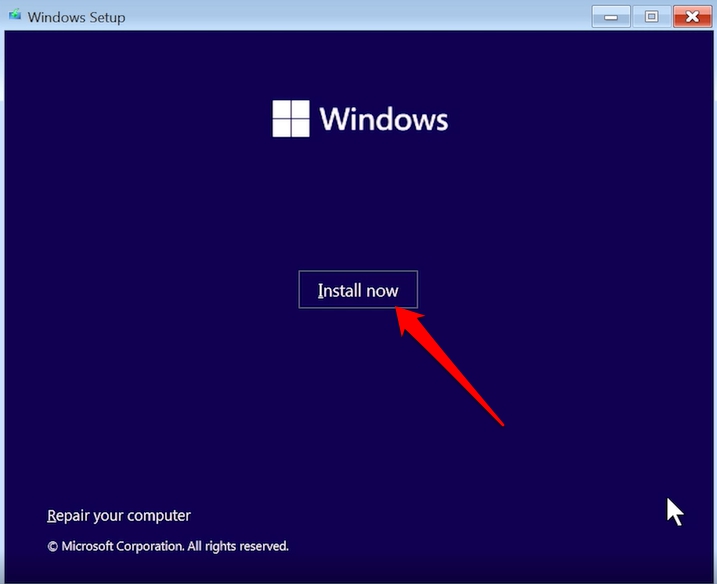
- Press Install Now to start the Windows 11 clean installation.
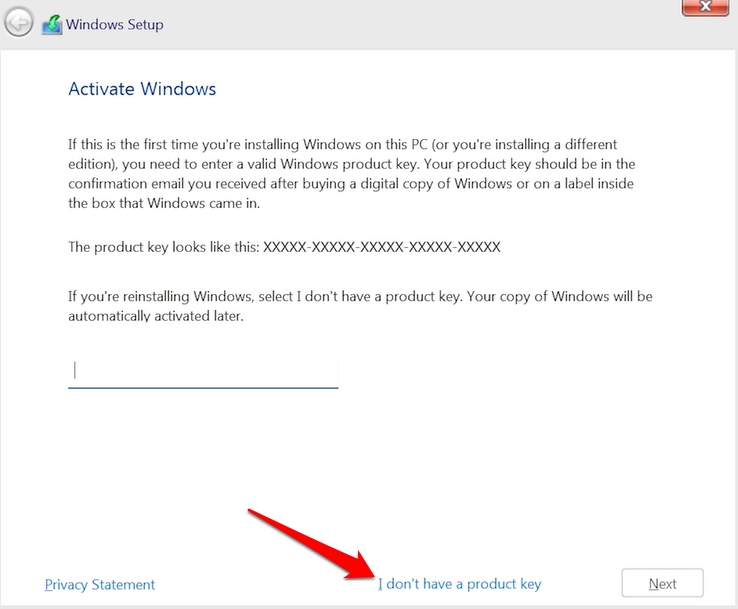
- When asked for a product key, press I don’t have a product key as you are already upgrading from Windows 10. Once the setup is complete and the PC connects to the internet, your copy of Windows 11 will be automatically activated.
- Select the Operating System.
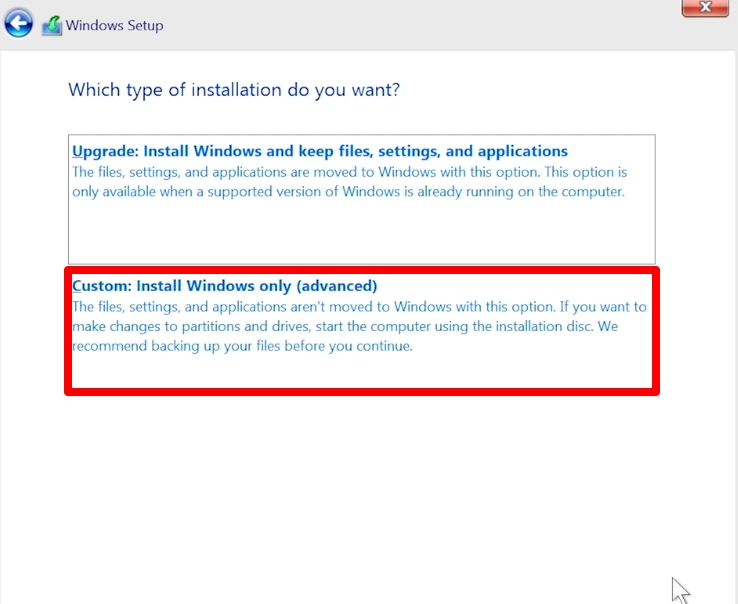
- Choose Custom: Install Windows Only.
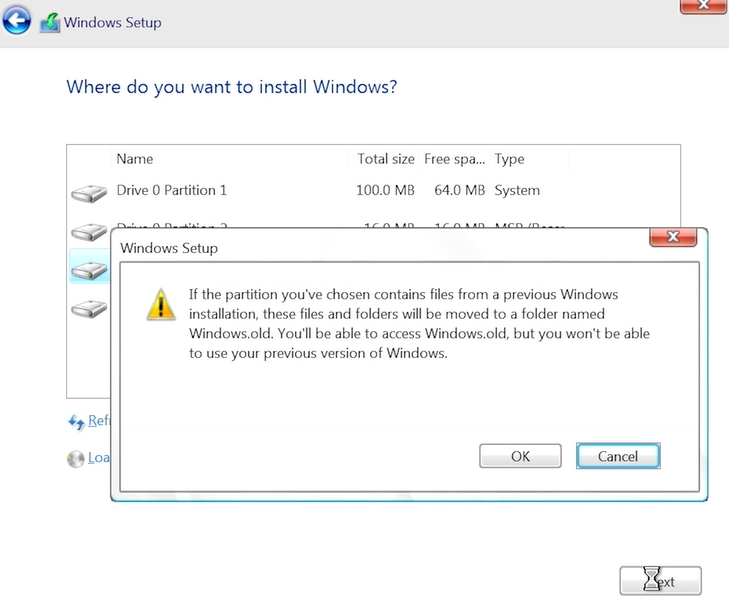
- Next, select the hard drive partition in which you want Windows 11 to install.
- PC will restart after the setup is complete and will boot into the Windows 11 desktop.
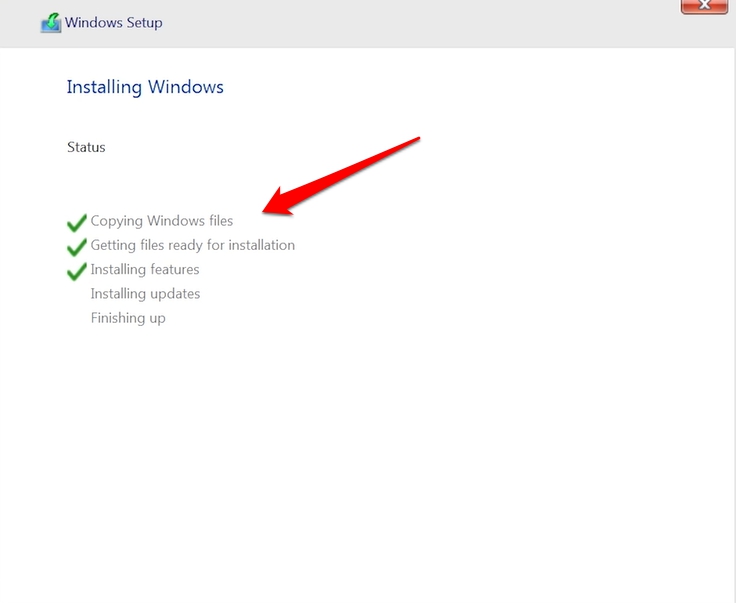
- Follow the on-screen prompts to complete the setup.
NOTE: You can only upgrade your PC from Windows 10 to Windows 11 if it meets the necessary hardware requirements to run Windows 11.
Configure Settings to Block Potentially Unwanted Apps on Windows 11
Once you step inside Windows 11, make sure to configure your PC to recognize and block low-reputation potentially unwanted apps.
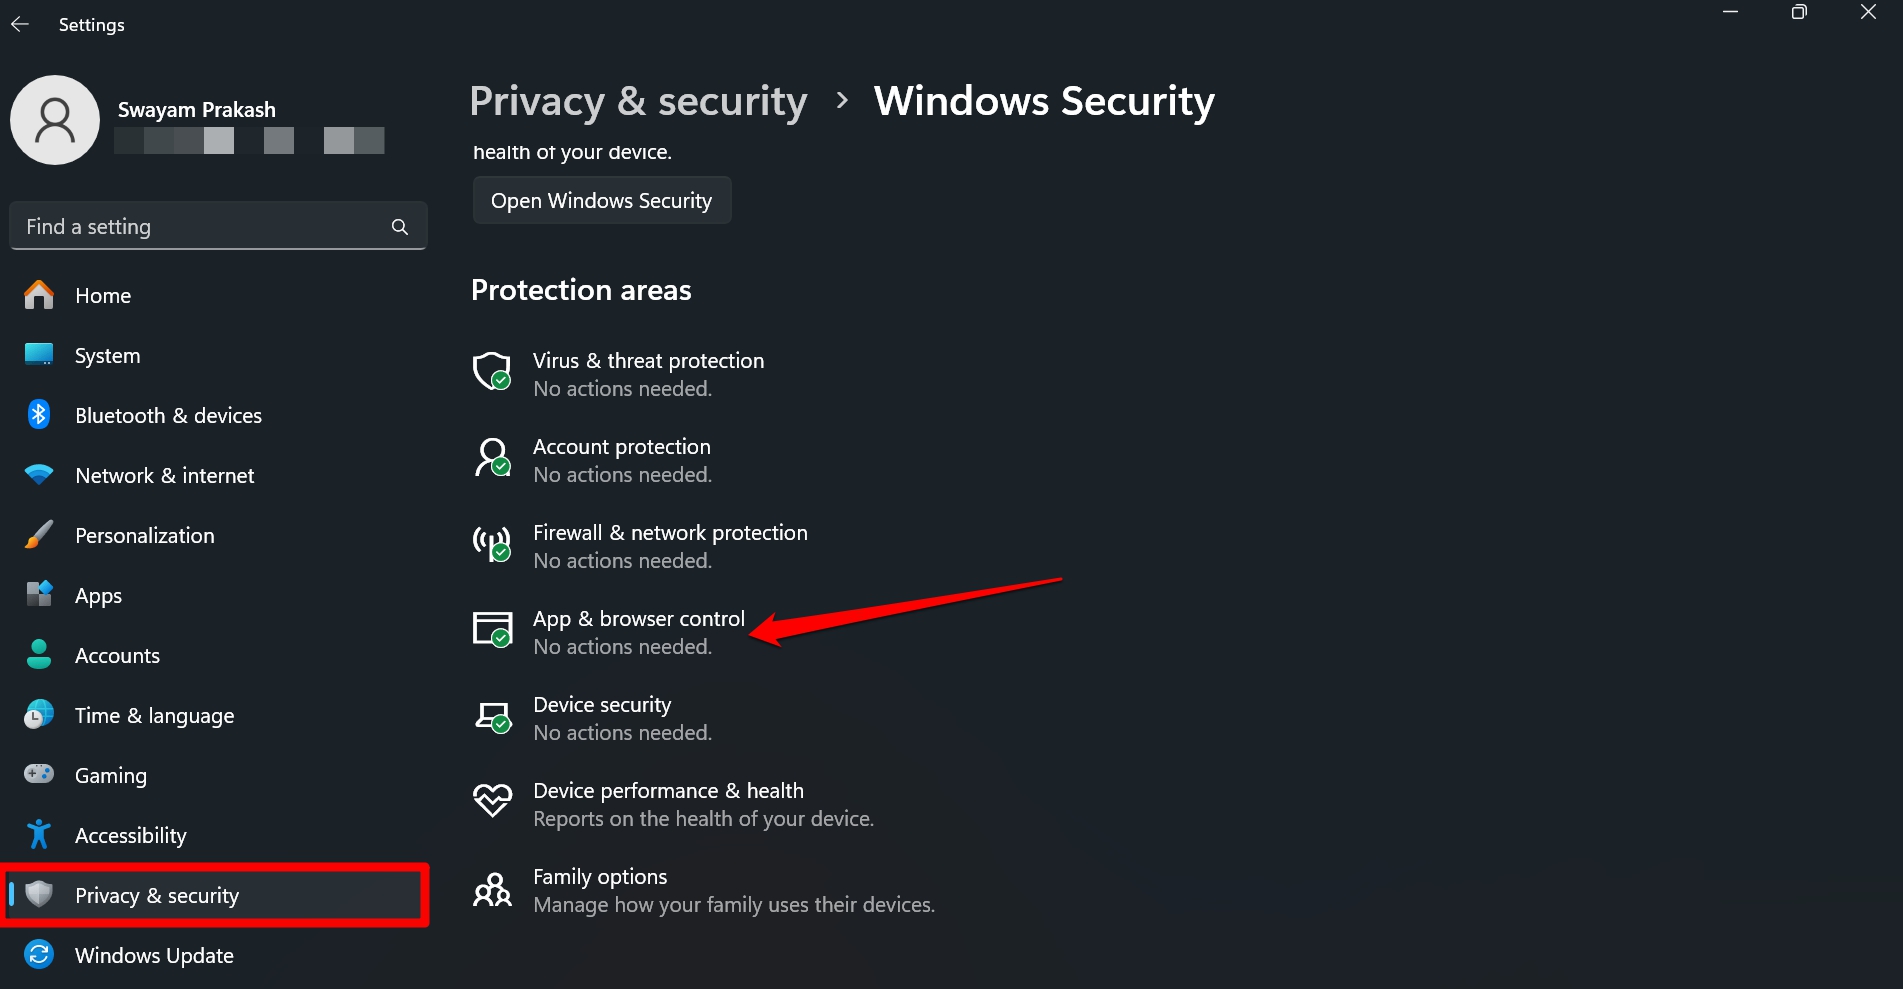
- Press Windows + I to access the settings home page.
- Click on Privacy and Security on the left sidebar.
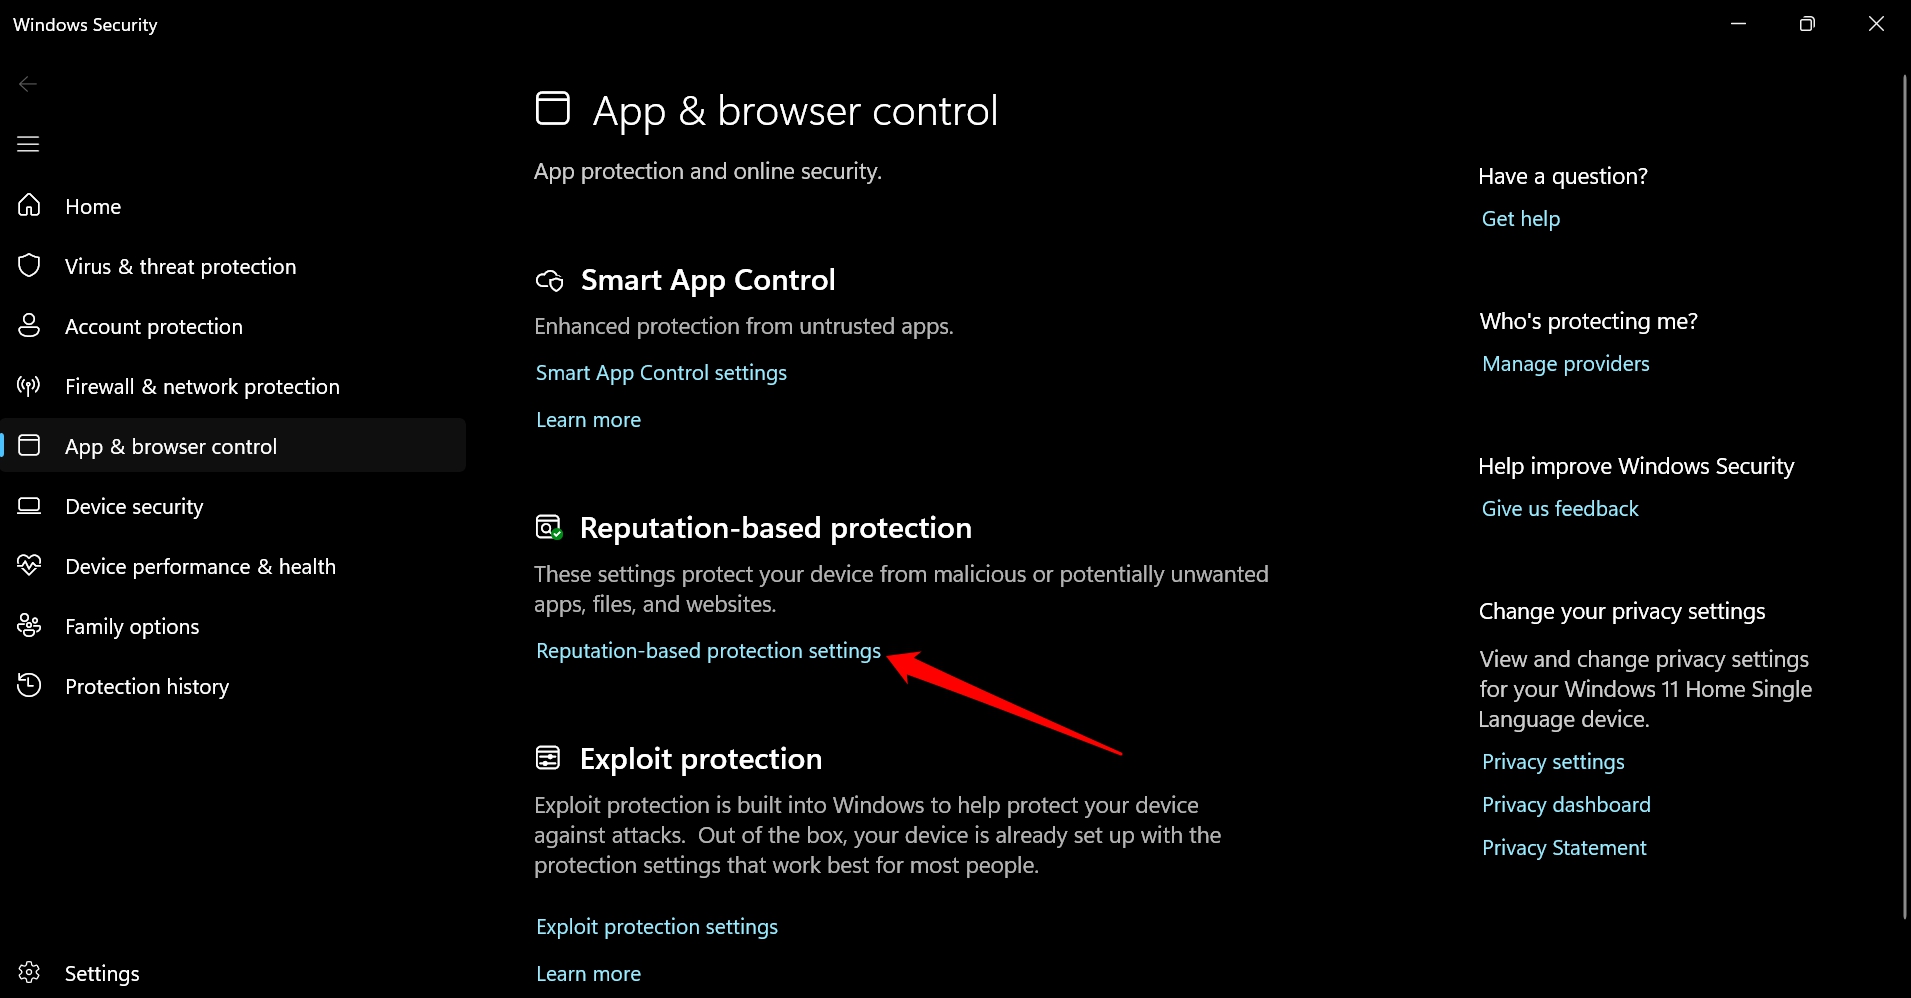
- Access App and Browser Control.
- Click on Reputation-based Protection settings.
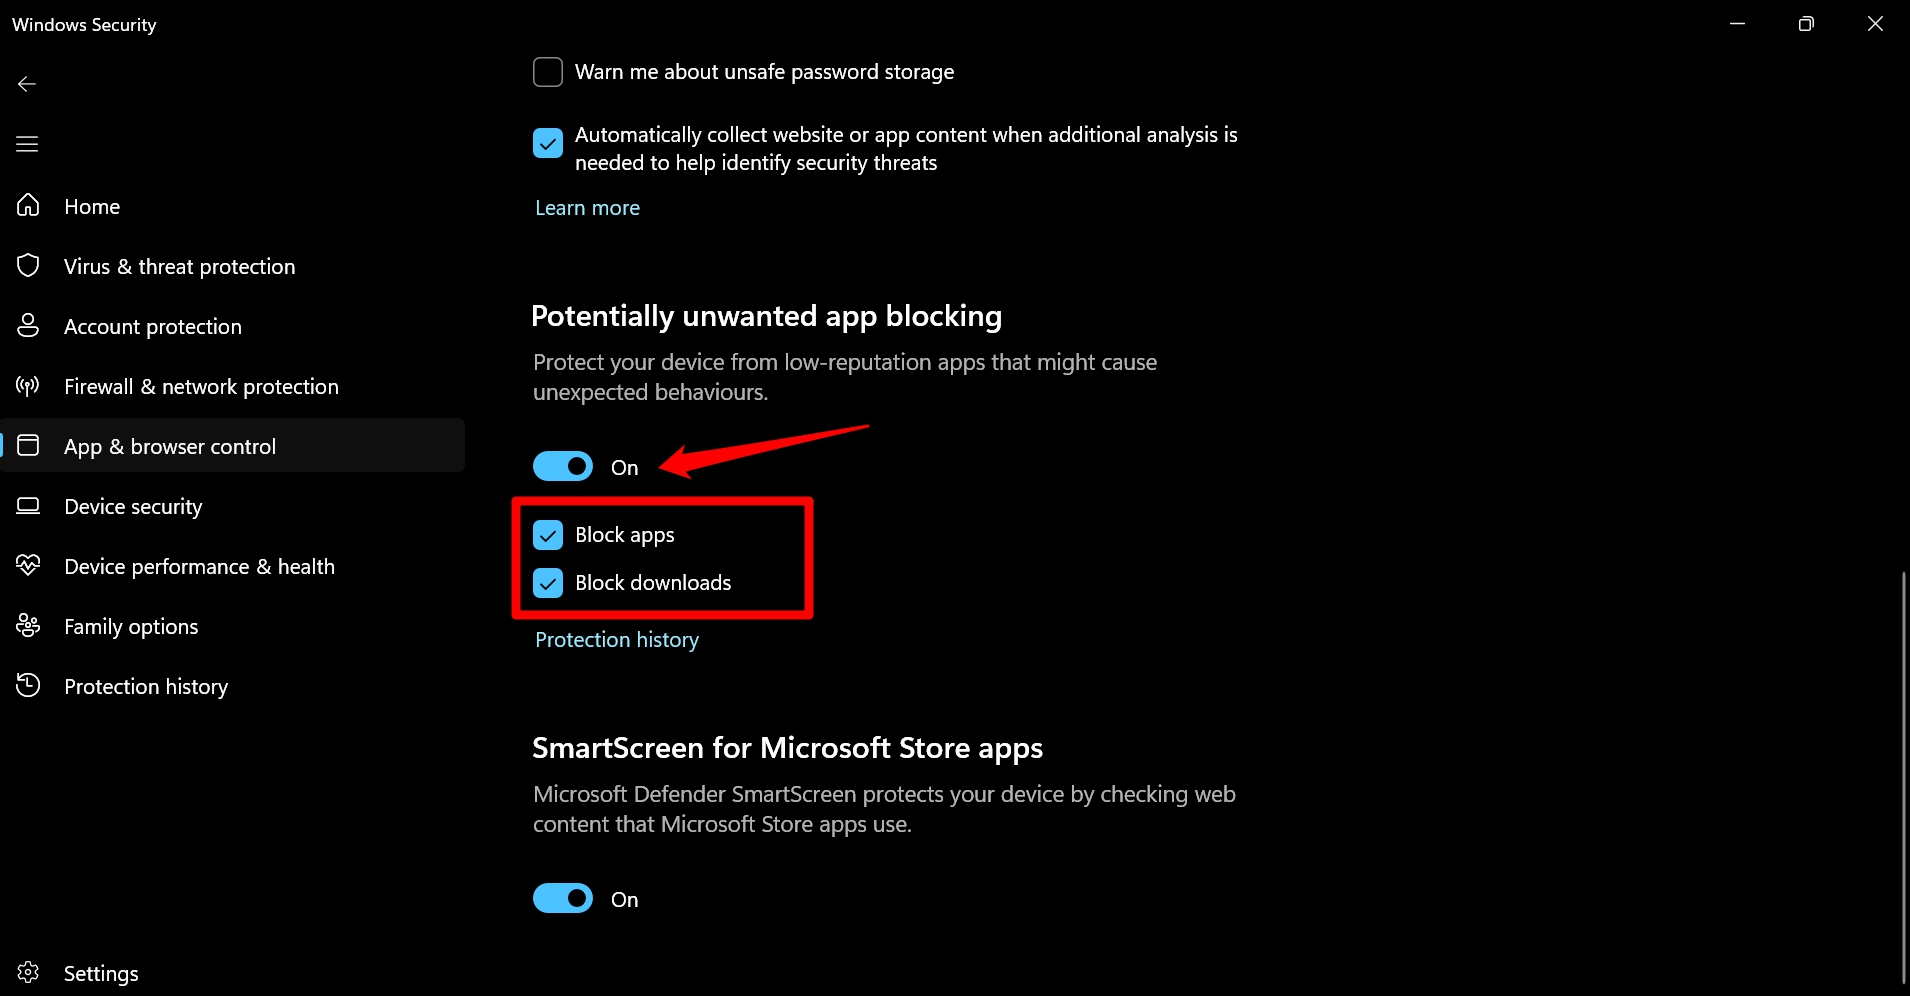
- Enable the toggle for Potentially Unwanted App Blocking.
- Turn on Block Apps and Block Downloads by pressing the checkbox beside them.
Here are a few pointers to avoid installing PUAs. Always download apps from the Microsoft Store. Regularly install Windows 11 updates to manage security issues with unknown apps and optimize the performance of your PC. Switch to the Microsoft Edge browser, as it deploys the Microsoft Defender SmartScreen to block unwanted apps.
After October 2025, Microsoft will pull the plug on Windows 10. PCs running on Windows 10 won’t receive any software or security upgrades. This will make your Windows 10 PC vulnerable to security exploits unless you upgrade to Windows 11.
So, this is the perfect time to onboard the Windows 11 experience and prevent unwanted apps from finding their way onto your PC, making your user experience terrible.
The post Microsoft: Don’t fall for unwanted apps on Windows 10, clean install Windows 11 ASAP appeared first on Windows Latest