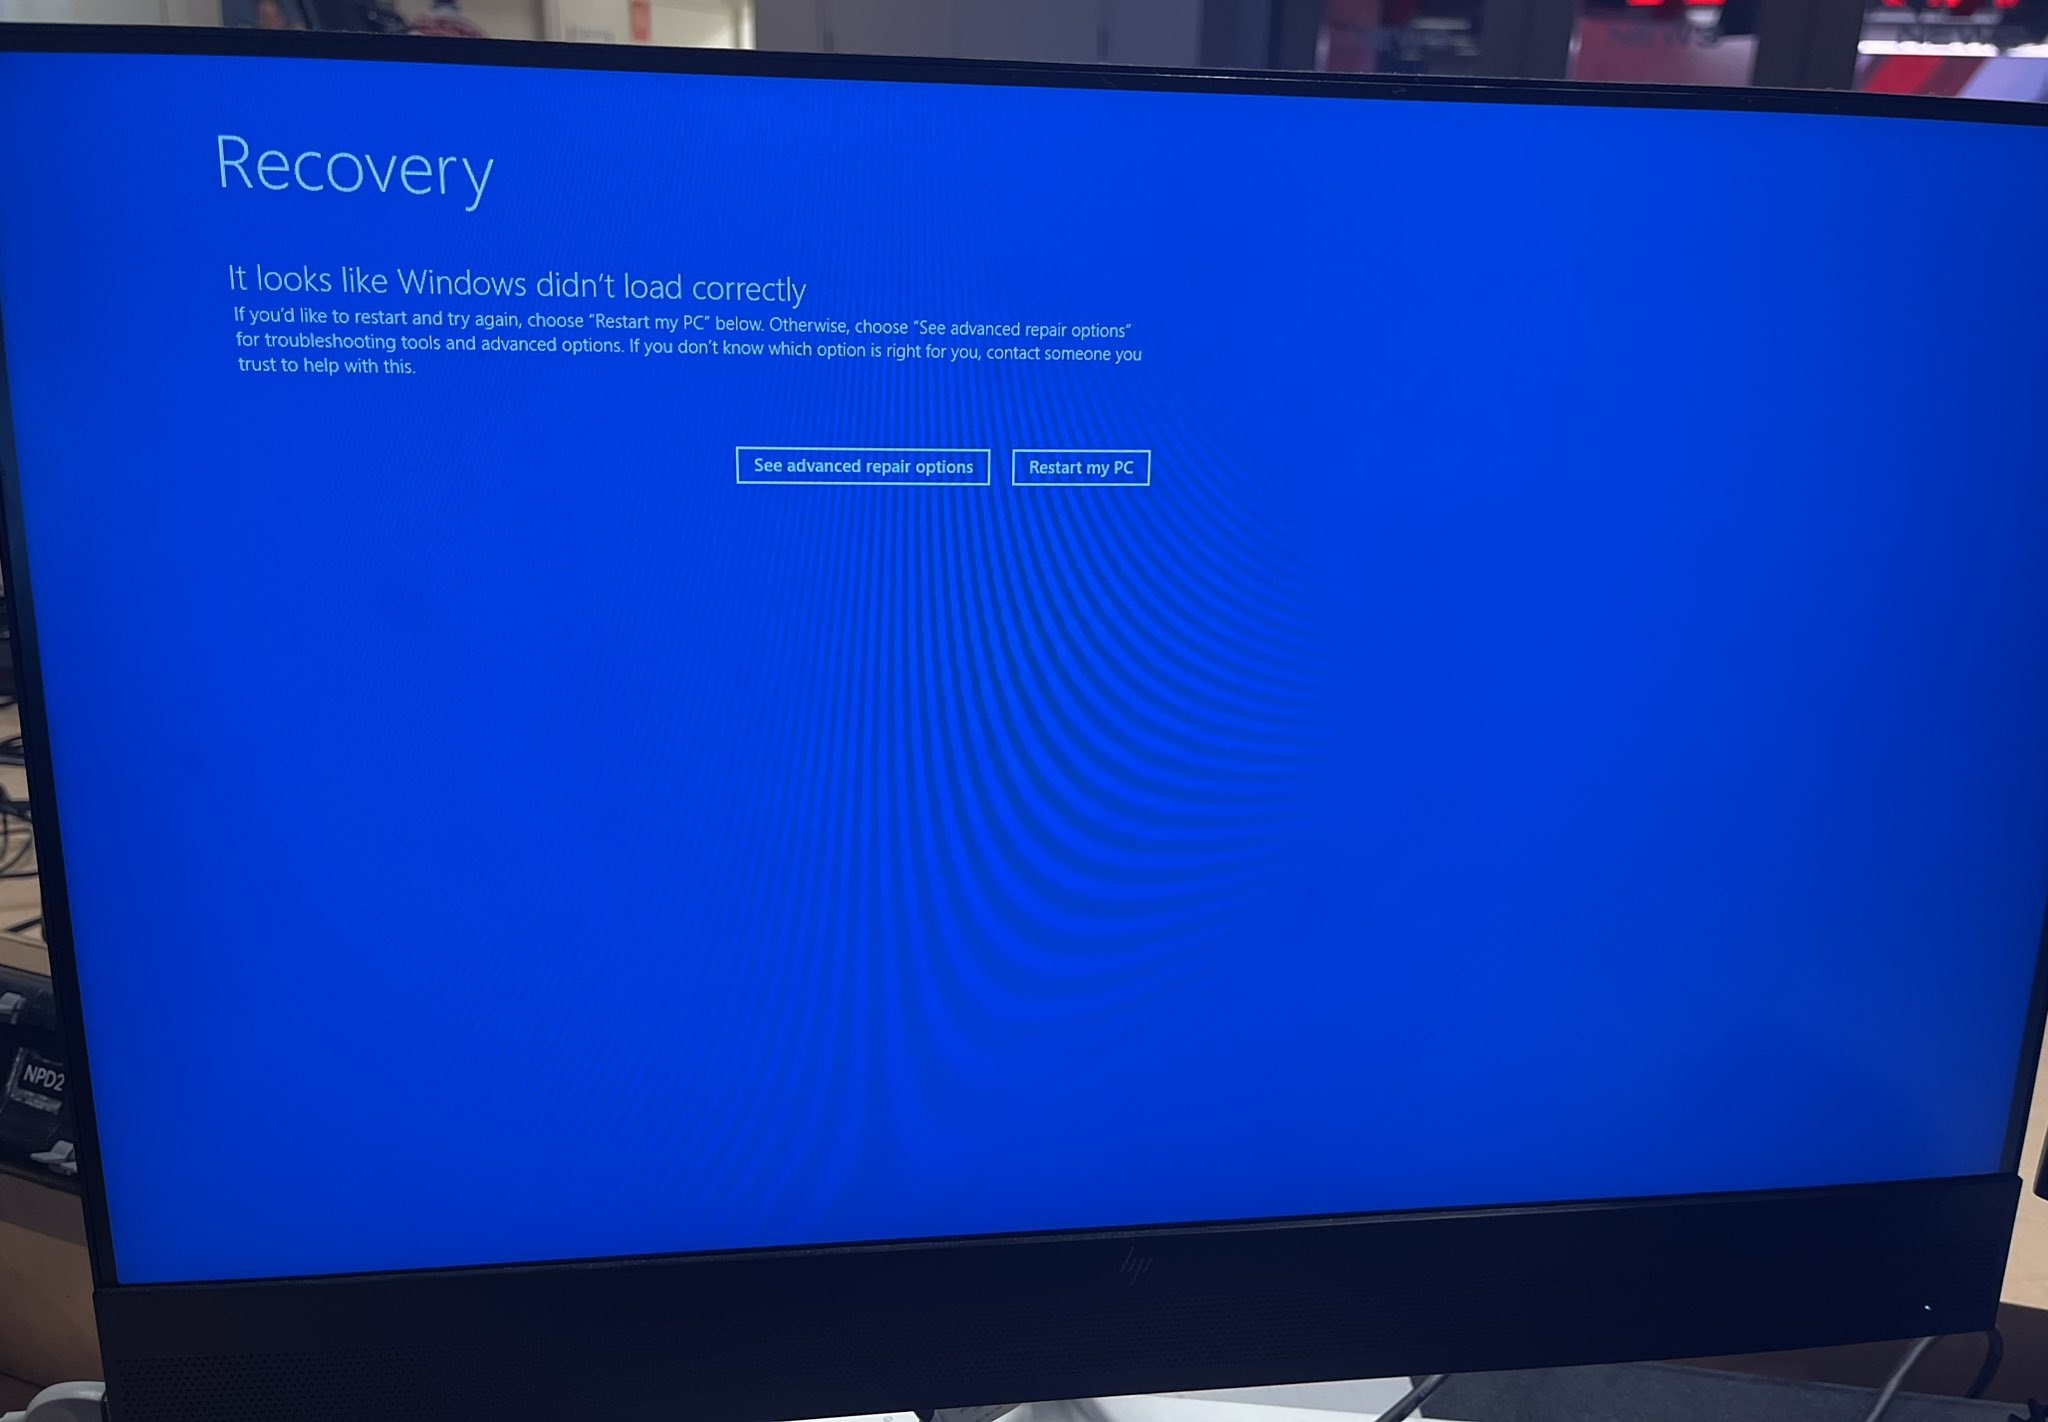
Several media companies, tech companies, and schools or universities are reporting a Blue Screen of Death on Windows 10. PCs are getting stuck at the “Recovery” screen, which states, “It looks like Windows didn’t load correctly. If you’d like to restart and try again, choose Restart my PC below.”
Security company CrowdStrike confirmed the massive Windows 10 BSOD outage is due to its new sensors update. As you probably know, CrowdStrike offers endpoint protection and other services, which are used by every other company, but a new update for CrowdStrike sensors is causing significant issues.
On X, there are widespread reports of Blue Screen of Death (BSOD) errors on Windows hosts, and they appear to be associated with multiple versions of CrowdStrike sensors. In our tests, Windows Latest observed that csagent.sys (or C-00000291*.sys) is causing the problem, so if you delete the file or rename the driver folder, you should be able to boot.
How to fix Blue Screen of Death and “Recovery”, “It looks like Windows didn’t load correctly” loop caused by CrowdStrike
Method 1: Use Safe Mode and delete the affected file
- You’ll need to boot to the Safe mode to follow the process. If you’re on the Recovery screen, click on “See advanced repair options” on the Recovery screen. In the Advanced Repair Options menu, select “Troubleshoot,” then choose “Advanced options.” Select “Startup Settings” and click “Restart.” After your PC restarts, press 4 or F4 to start your PC in Safe Mode. Alternatively, you can also shut down the PC, turn it on, and repeatedly press F8 until the Advanced Boot Options menu. From there, select Safe mode.
- In Safe mode, open Command Prompt (admin) or Windows PowerShell (Admin).
- In the Command Prompt, type the following command to navigate to the CrowdStrike directory: cd C:WindowsSystem32driversCrowdStrike
- To delete the affected file, you need to locate the file that matches the pattern C-00000291*.sys.
- First, run the following command to find the file matching the pattern: dir C-00000291*.sys.
- For example, it might be named something like C-00000291abc.sys.
- Once you’ve identified the file, delete it using del C-00000291.sys
In the above case, del C-00000291.sys is the name of the file that showed up on our system, and it could be something else for you. To correctly identify the file, make sure you follow the steps and use dir command.
Method 2: Use Safe Mode and rename the CrowdStrike folder
If you’re stuck at the above screen, try these steps:
- Click on See advanced repair options on the Recovery screen.
- In the Advanced Repair Options menu, select Troubleshoot.
- Next, choose Advanced options.
- Select Startup Settings.
- Click on Restart.
- After your PC restarts, you will see a list of options. Press 4 or F4 to start your PC in Safe Mode.
- Open Command Prompt in Safe Mode.
- In the Command Prompt, navigate to the drivers directory: cd windowssystem32drivers
- To rename the CrowdStrike folder, use ren CrowdStrike CrowdStrike_old
You can also boot to the Safe mode by shutting down your computer and pressing the F8 key repeatedly until the Advanced Boot Options menu appears. From there, you can select Safe Mode and press Enter. Finally, follow the steps from number seven.
The above guide renames the crowdstrike folder in c:windowssystem32driverscrowstrike to CrowdStrike_old, which fixes the problem and allows your PC to boot to the desktop.
Method 3: Use Registry Editor to block CSAgent service
Windows Latest understands that there’s a second workaround that modifies your Registry to block the CSAgent (csagent.sys, responsible for BSODs):
- Restart Windows 10. Keep hitting F8 key until the Advanced Boot Options menu appears.
- Boot to the Safe mode and open Windows Registry Editor (Use Win+R to find Registry Editor).
- In the Registry Editor, navigate to the following path:
- HKEY_LOCAL_MACHINESYSTEMCurrentControlSetServicesCSAgent
- In the CSAgent key, find the Start entry on the right pane.
- Double-click on Start to edit its value.
- Change the value data from 1 (which means the service is set to start automatically) to 4 (which disables the service).
- Click OK to save the changes.
- Close the Registry Editor and Restart:
I understand that some of you may not want to make dramatic changes to your PC by reading an article on the internet, but I can explain the changes we’re making here:
- HKEY_LOCAL_MACHINESYSTEMCurrentControlSetServicesCSAgent: This path contains configuration settings for the CSAgent service, which is part of the CrowdStrike agent.
Next up is the Start Value, which determines how and when the service starts. In this case, the csagent.sys is causing the reboot loop on Windows 10. We need to turn off the service from starting when you boot your PC. That’s why we’re changing it to “4”. This turns off the service.
The possible values are 0, which stands for Boot start (loaded by the boot loader, rarely used). The value “1” refers to system start (loaded by the I/O subsystem). We also have 2, which refers to Automatic start (loaded automatically by the Service Control Manager during system startup).
Then we have “3” Manual start (which requires manual start). The “4” value switches the service to a disabled state (the service is not started). We need to set the value to “4” to turn off the service, and allow Windows to boot normally.
CrowdStrike confirms Blue Screen errors on Windows 10 with “It looks like Windows didn’t load correctly” boot loop
While people initially assumed it was Microsoft’s fault, it turned out the mess was caused by CrowdStrike.
CrowdStrike periodically updates its own software, known as sensors, which are deployed on client machines to provide endpoint protection, but the recent update broke the csagent.sys.
CrowdStrike has acknowledged the reports and provided the following statement: Hello everyone – We have widespread reports of BSODs on windows hosts, occurring on multiple sensor versions. Investigating cause. TA will be published shortly.
This is a developing story….
Header image credit: Troy Hunt on X.
The post Windows 10 BSOD, stuck at recovery due to CrowdStrike, but there’s a fix appeared first on Windows Latest